
Chargebee
On this page, you will find guides that are your go-to resource for merging the powerful capabilities of BoomFi and Chargebee to enhance your business operations. This allows you to take advantage of all BoomFi offers within your Chargebee platform.
BoomFi will now be able to incorporate a link for cryptocurrency payments into invoices generated by Chargebee, offering users a more seamless payment experience. As a result, BoomFi will serve as a payment method, providing a pay link for each invoice created and enabling customers to settle the invoice using cryptocurrency.
Auto chargeBoomFi does not offer automatic payment collection since we do not handle the "auto charge" functionality. If you want to enable the ability to automatically charge a customer in cryptocurrency, you must create a paylink through BoomFi's dashboard, and the customer must pay by providing a wallet signature through the Connect Wallet method.
How to integrate
To fully integrate BoomFi with Chargebee, you need first to enable the integration, then set up your webhooks, and finally, understand how to use the custom fields option.
Enable integration
To enable the integration, you need to obtain your Chargebee API key:
- Log in to your Chargebee account.
- Navigate to Settings > Configure Chargebee in the left-hand menu.
- Click Add API Key under the API Keys section.
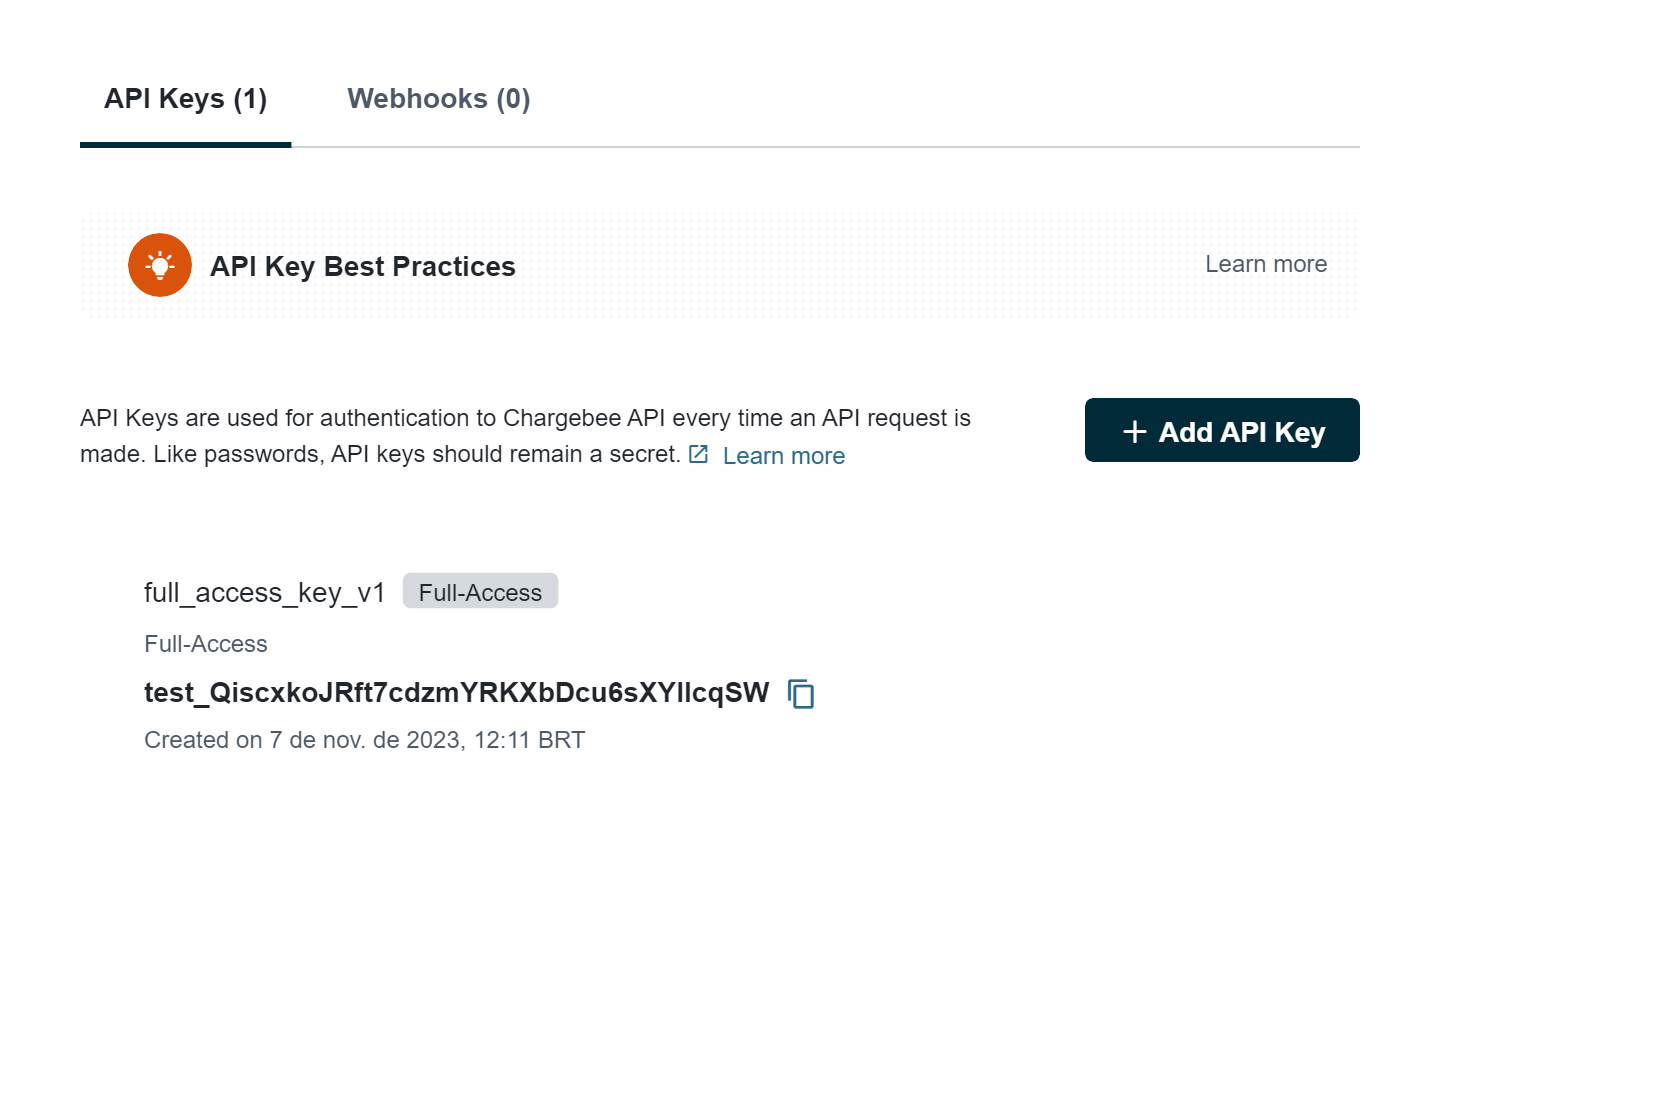
- Select Full-Access Key.
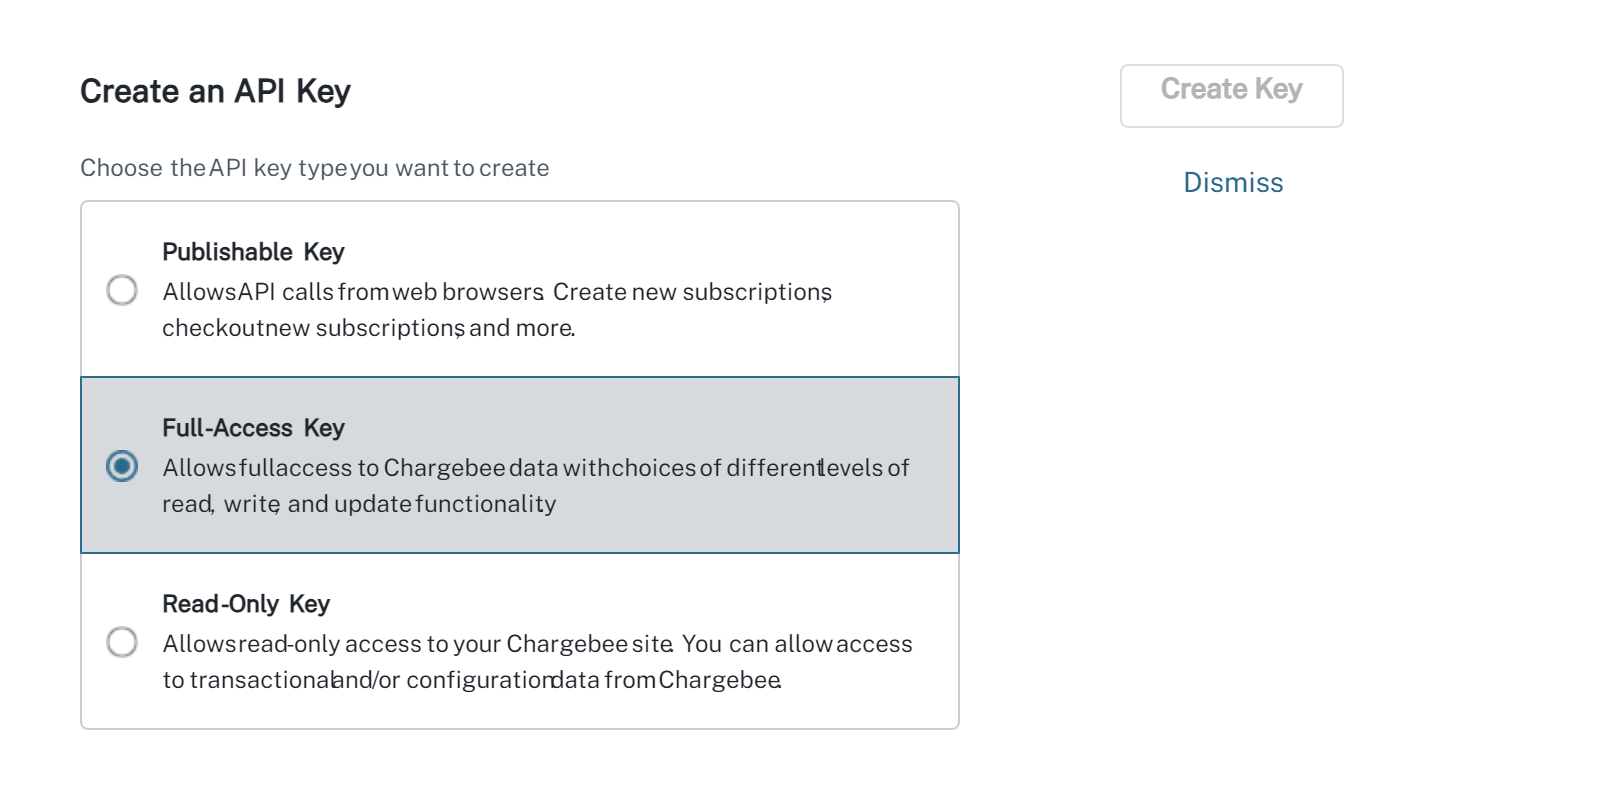
- Select All and give this API Key a name (E.g., “BoomFi Integration”).
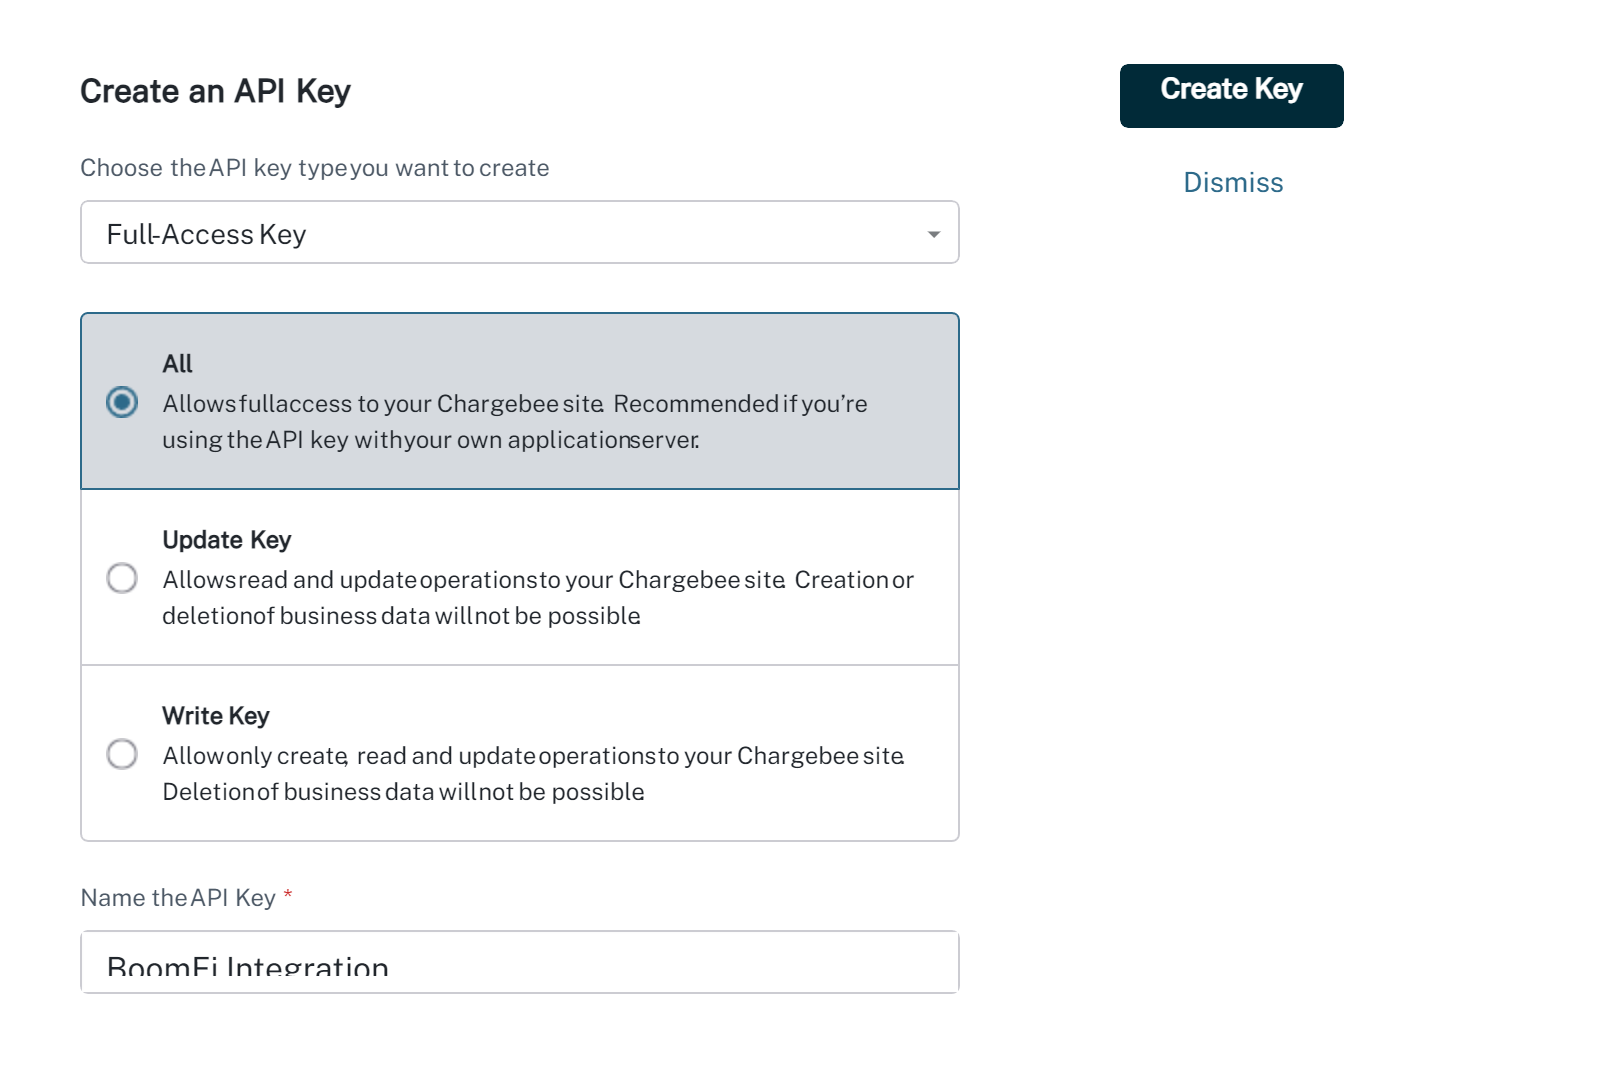
- Create Key.
WarningMake sure to keep your API key secure and avoid sharing it with unauthorized individuals.
- Log In into your BoomFi Account.
- Go to Settings > Integration, find Chargebee, and click Connect.
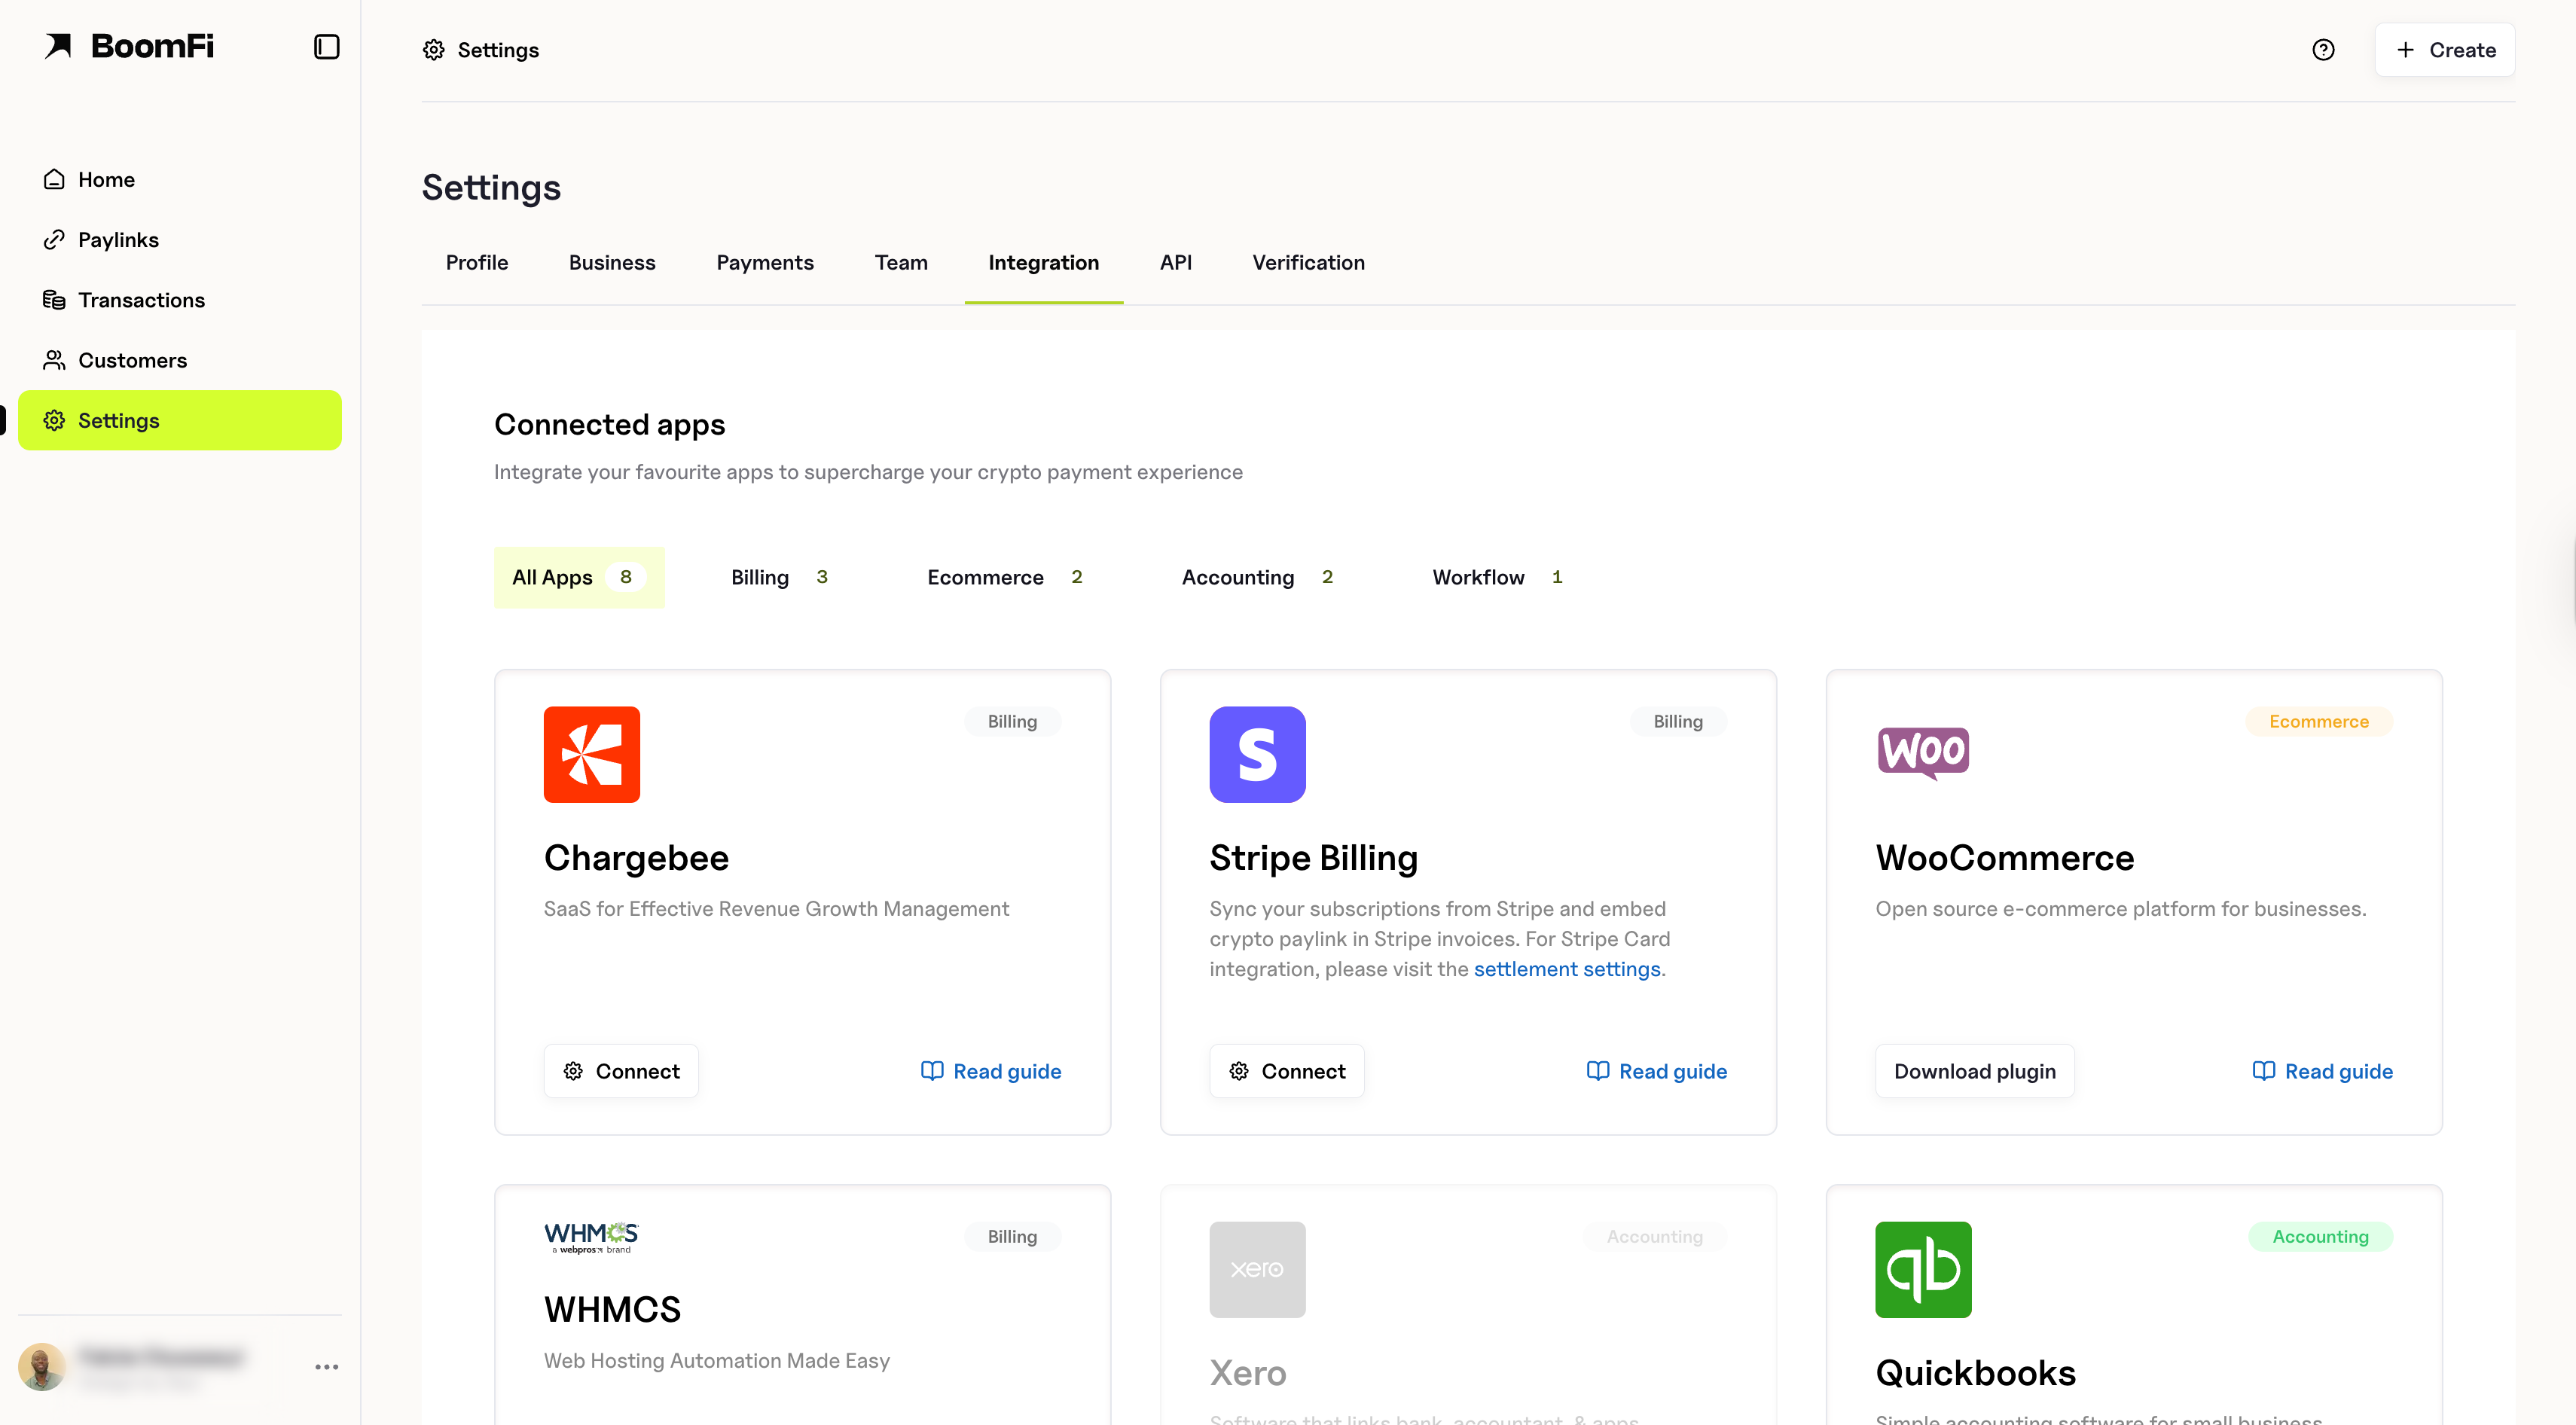
- Provide your Chargebee domain and the Full-Access API Key you just created found on your Chargebee Account URL.

WebhookUse the Webhook URL set above to configure your webhook in Chargebee. To learn how to configure it, see the Webhook section of this page. Using a webhook is highly recommended due to the significant throttling penalties associated with relying solely on API calls.
- Click Connect.
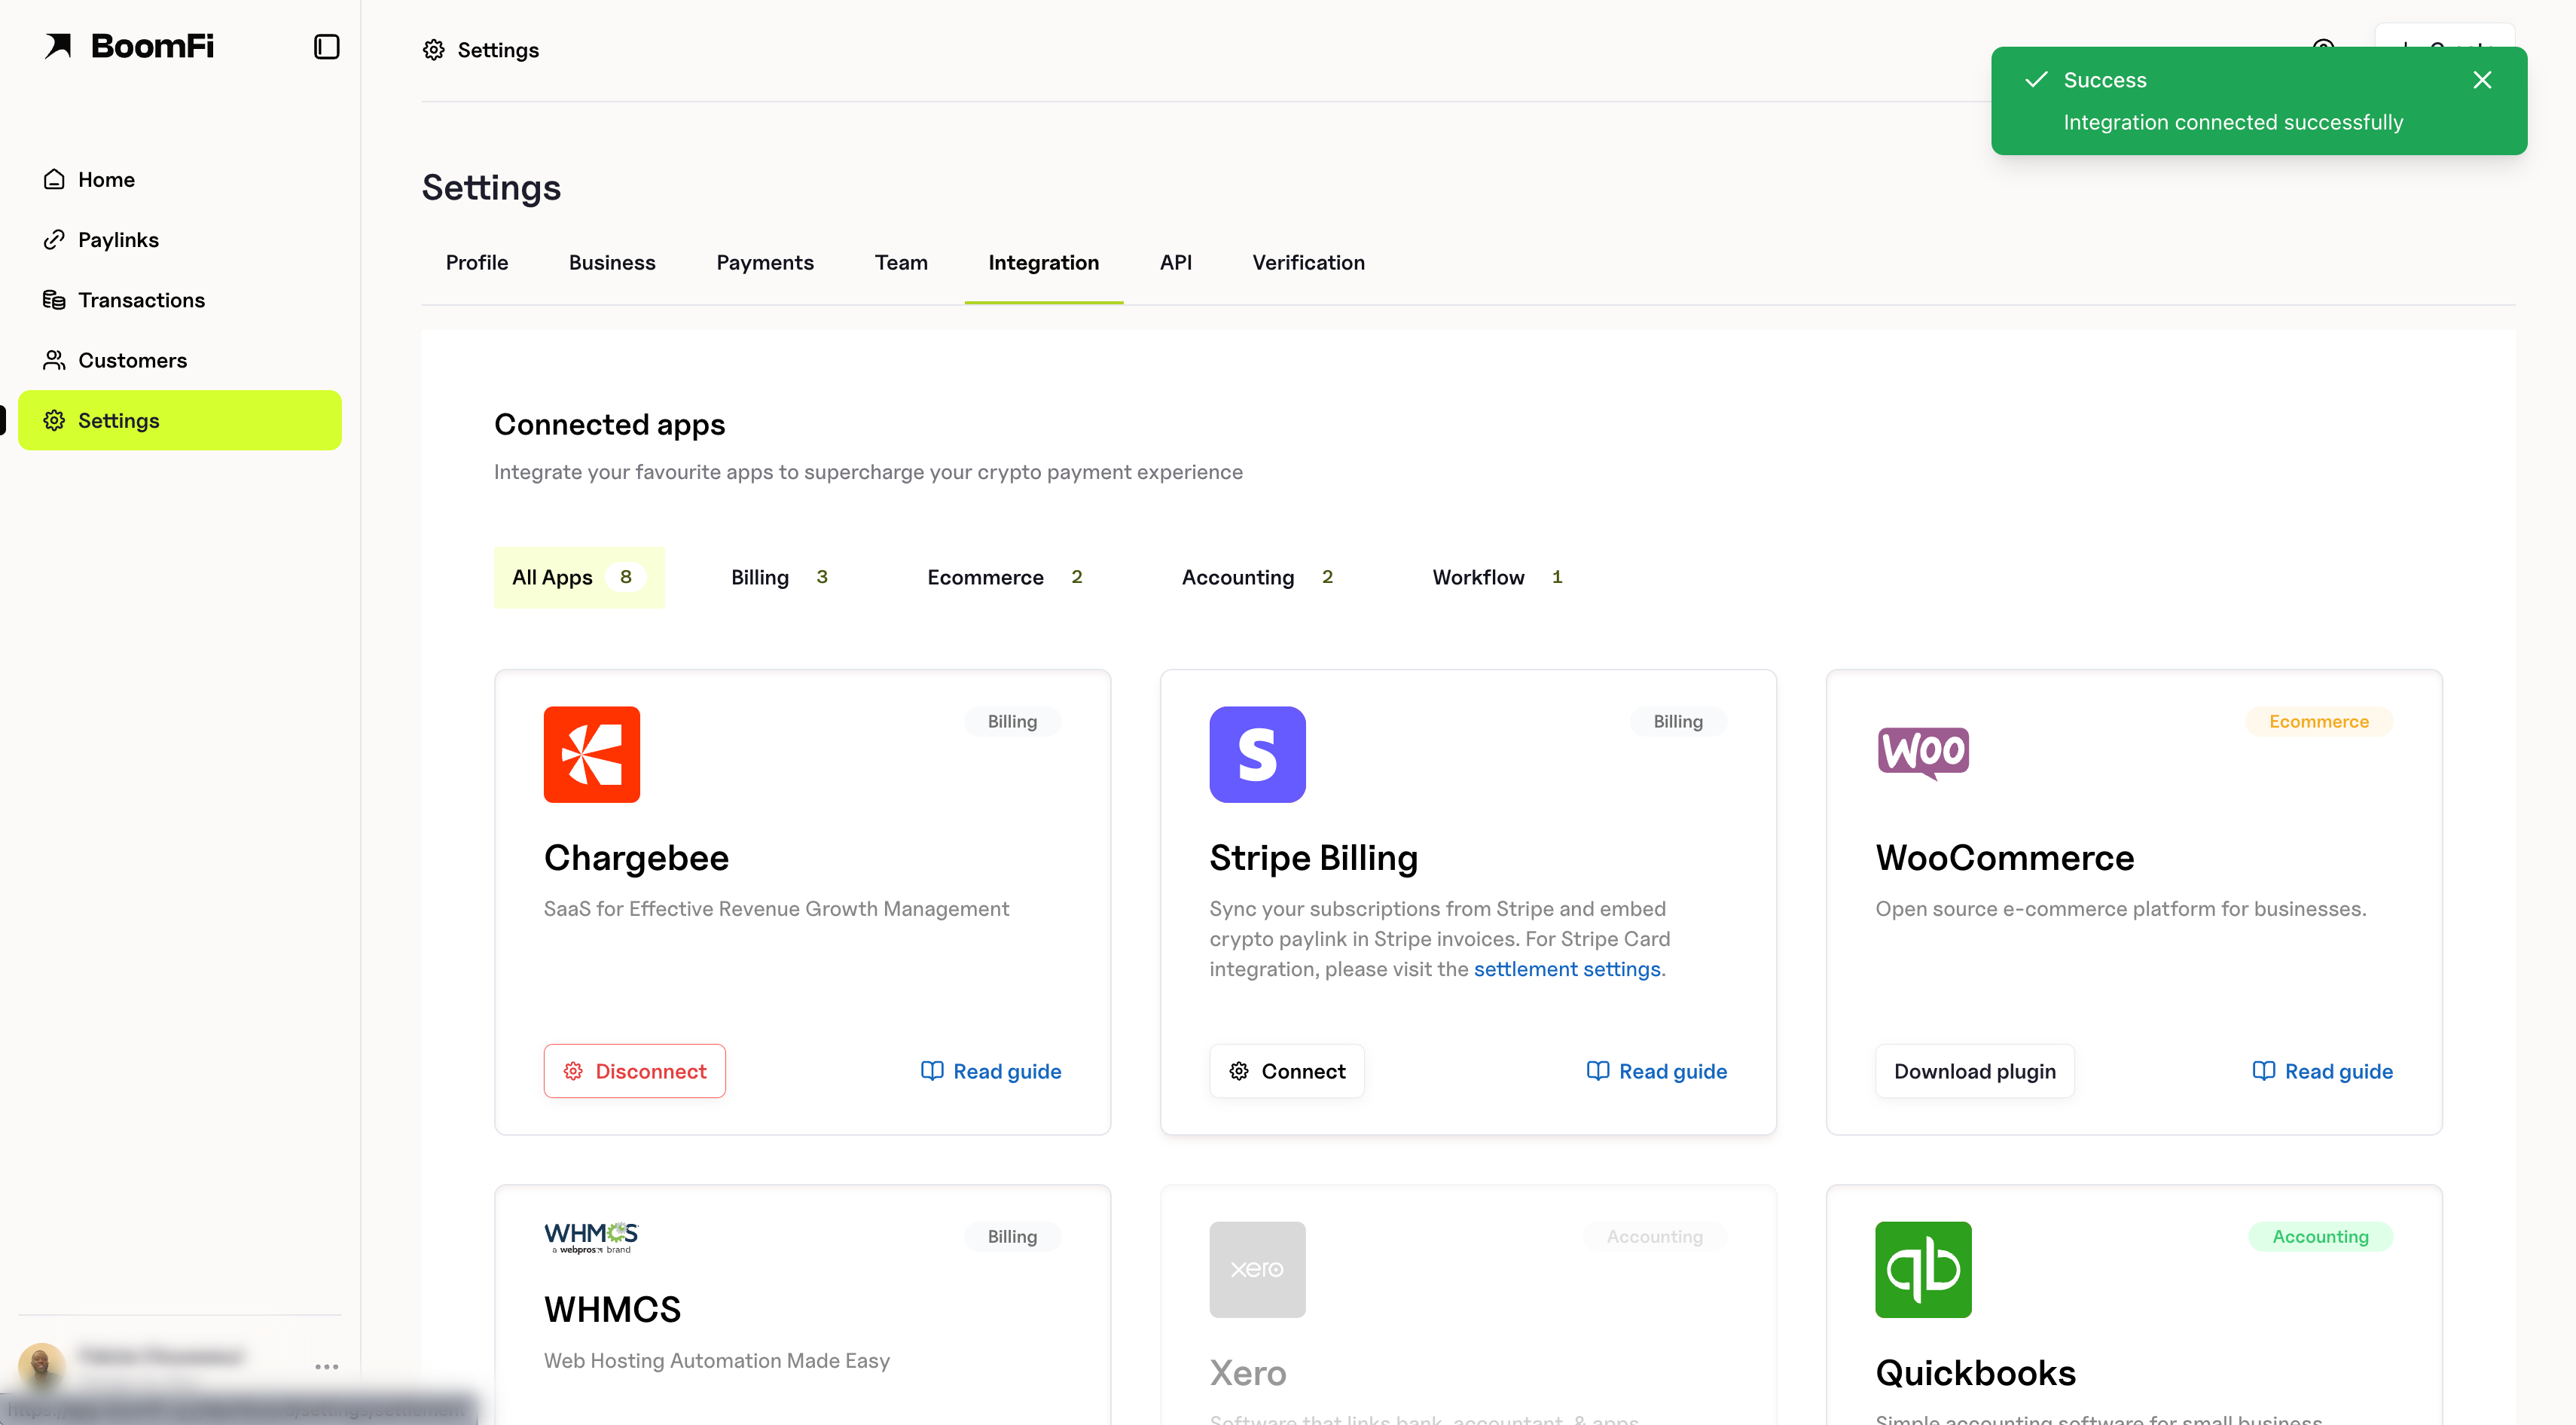
With everything correct, ChargeBee will appear as a connected integration, and at the top right corner of the screen, you will receive a Success pop-up.
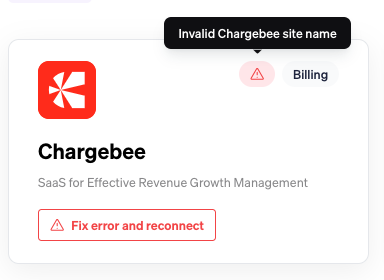
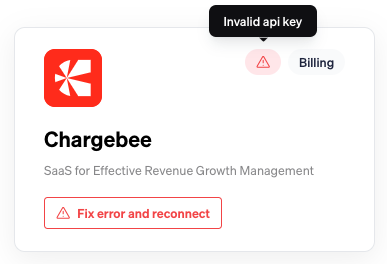
Errors and Diagnosis
When executing the steps above, you may encounter an error, and the error icon will present you with relevant messages as below:
- Invalid Chargebee Site name: Please check if the site name is correct and corresponds to the one in the URL of your Chargebee account.
- Invalid API Key: Please check if the API key matches the one you’ve generated on Chargebee and that it is not Disabled.
Setup Webhooks
Chargebee automatically synchronizes every 10 minutes between the systems. For instant sync, you can implement webhooks.
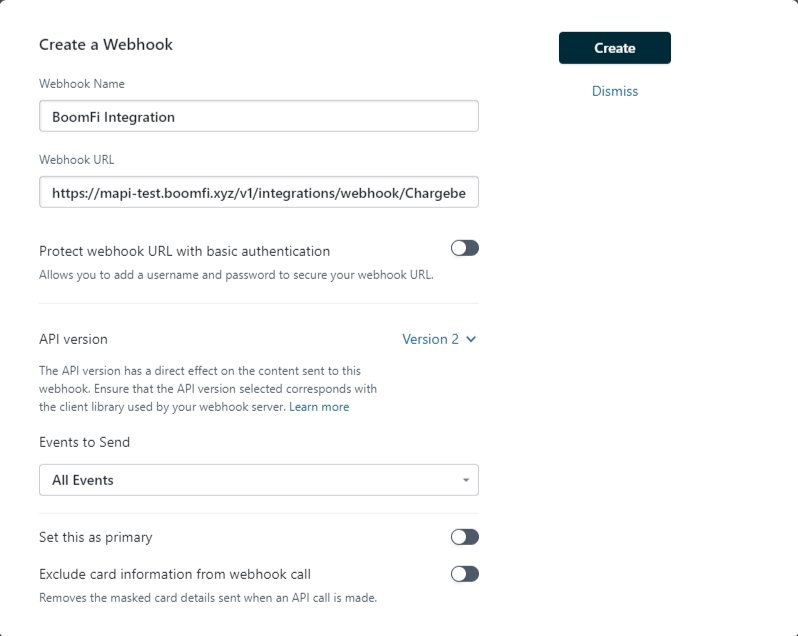
- Have the webhook URL configured in Step 9 of Enable integration in hand.
- Navigate to to Settings > Configure Chargebee > Webhooks.
- Add Webhook.
- Enter a Webhook Name (E.g., “BoomFi Integration”).
- Provide a Webhook URL. It needs to be in the following format:
https://mapi.boomfi.xyz/v1/integrations/webhook/Chargebee/<siteID>- Turn off the Protect webhook URL with basic authentication, Set this as primary, Exclude card information from webhook call options.
- Select All events for the Events to Send option.
- Click Create.
Custom Fields
Enrich payment records with crypto-specific data points. Use these fields for mail merge to enrich your search and filtering features on Chargebee.
Chargebee docsFind more about setting up custom fields in https://www.chargebee.com/docs/2.0/custom_fields.html.
You can create the following fields with BoomFi:
Customer
| Field Name | Type | Name |
|---|---|---|
cf_boomfi_wallet_address | Single line text | Wallet Address |
Charge Price
| Field Name | Type | Name |
|---|---|---|
cf_boomfi_payment_network | Single line text | Network |
cf_boomfi_amount | Single line text | Amount |
cf_boomfi_currency | Single line text | Currency |
cf_boomfi_paylink | URL | Paylink |
Plan Price
| Field Name | Type | Name |
|---|---|---|
cf_boomfi_payment_network | Single line text | Network |
cf_boomfi_amount | Single line text | Amount |
cf_boomfi_currency | Single line text | Currency |
cf_boomfi_paylink | URL | Paylink |
Required?All fields above are not mandatory, however we recommend provisioning all the fields to have the best experience.
Test a payment
You can test a payment situation to validate that the integration is working flawlessly. To test it, follow these steps:
- Select a paylink from BoomFi.
- Go through all the payment process, executing a new payment.
- Upon successful payment, access Invoices in your Chargebee dashboard.
- Validate that a new invoice has been generated with the associated payment information and details.
Subscriptions
Refer to the Subscribing a Customer page to understand how to create subscriptions in Chargebee using BoomFi's integration.
Updated 6 months ago